Wordpress in a VM
When you're using wordpress, it comes in handy to have an installation to play around with. When I first joined the Wordpress for Scientists Google Group, I promised to write a tutorial. Well, it took me a bit to find the time, but Booles' Rings helped me get back to this.
This tutorial is very rudimentary for now, but leave a comment and I'll gladly clarify things (and add more screenshots etc).
The tools
I'm lazy, so to get a nice preconfigured, downsized ubuntu with wordpress nicely set up, you head over to turnkeylinux.org and get their wordpress appliance. More precisely, you'll want the version for a virtual machine (VM) (click the picture to see my cursor hovering in the right place...).
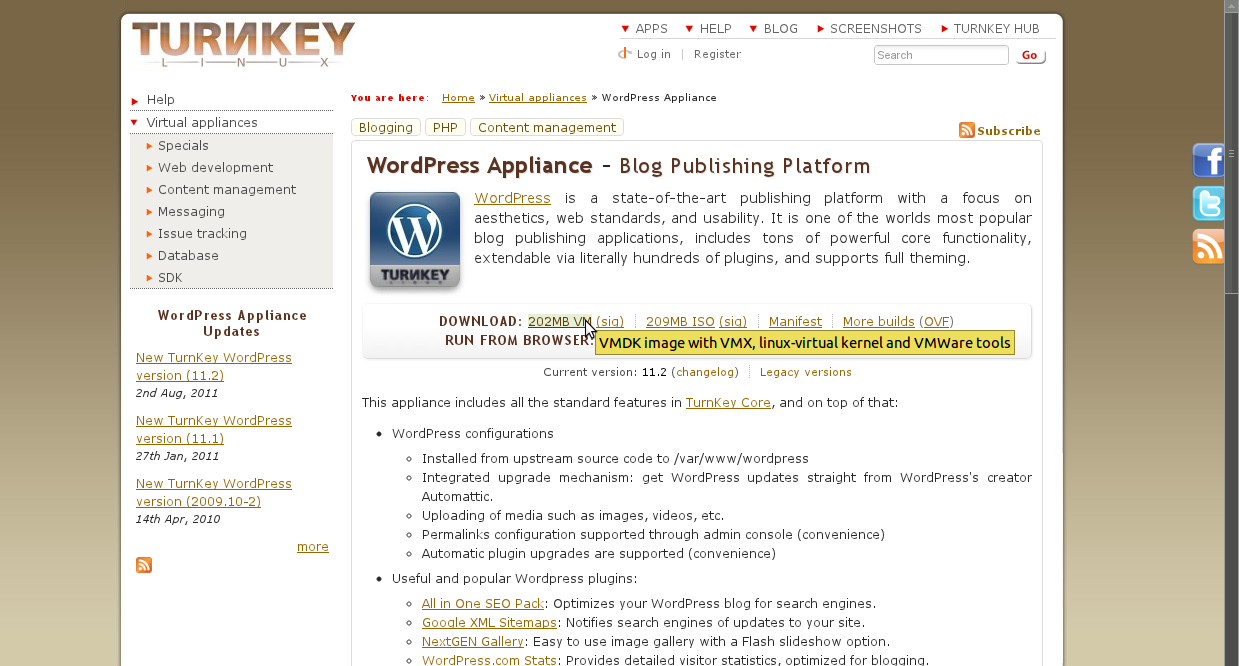
Just download and unzip it somewhere helpful. You might want to remember the standard passwords for the machine mentioned on the download page (or at least remember where to find them).
Next we get our actual virtual machine. As an open source fan, I would suggest virtualbox which comes in two free versions, one free as in beer (with extras you won't need) and one free as in speech. Don't worry that the turnkey image you just downloaded is officially for VMware -- virtualbox is just as fine.
The nice thing about virtualbox is, of course, that it's available for linux, macos and windows. So pick your poison from their download section and install it.
Creating a virtualmachine
Well, as Jarvis says, do what you do best and link to the rest. I mean, You could just start up virtualbox and hit the "new" button and see how it goes. You could also take a look at the section in the manual. Don't be afraid -- it's actually well written and concise.
But you could also consult this full fledged tutorial filled with screenshot goodies for every step (it's written for something intriguingly called "mindtouch").
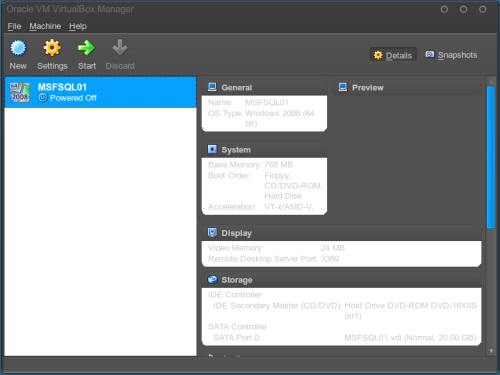
What, you're still reading this? Alright! In that case, after starting virtual box the main window should look something like this.
So you
- hit the "New" button
- choose a name
- choose ubuntu 32bit as the vm's operating system
- choose the vmdk file from the turnkeylinux as your hardrive (which means you'll have to "add" it to virtualbox's harddisk-file-list first, but I trust you'll figure that step out)
For everything else, take the default settings.
Network settings
After the maching was created you might want to change the networking settings (the standard settings didn't work for me). In my experience a "host-only" network is the easiest solution (unless you want to connect to the vm's wordpress installation from outside your host machine).
Just go to the settings of the vm you just created, switch to the "network" section and change the active network controller's "Attached to" setting to "host only adapter". This should look something like this:
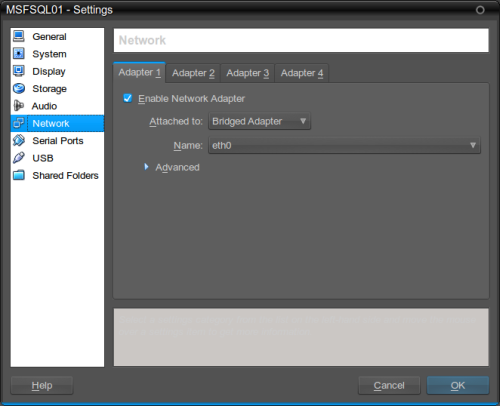
This way, the network is only a virtual one between your host operating system and your virtual machine.
And off she goes
Now just fire up the vm, i.e., hit the "Power" button, and get accustomed to switching in and out of the VM (virtualbox will tell you how). Turnkeylinux will possibly ask you some basic questions and maybe run an update.
At the end of the process you should find the VM displaying a blue text console gui with the IP adress of the machine.
Open a browser on your host, open the ip and experiment away!
Credit: the last two screenshots are licensed under cc-by-nc by mikefal.net (I can't run virtualbox on the machine I'm writing this...).